
For Contractors
October 19, 202610 min readWhat Has To Be Ready Before A Boardroom Table Installation
A stone boardroom table installation succeeds or fails on site readiness, not fabrication. Here is what general contractors should have in place before the table arrives.
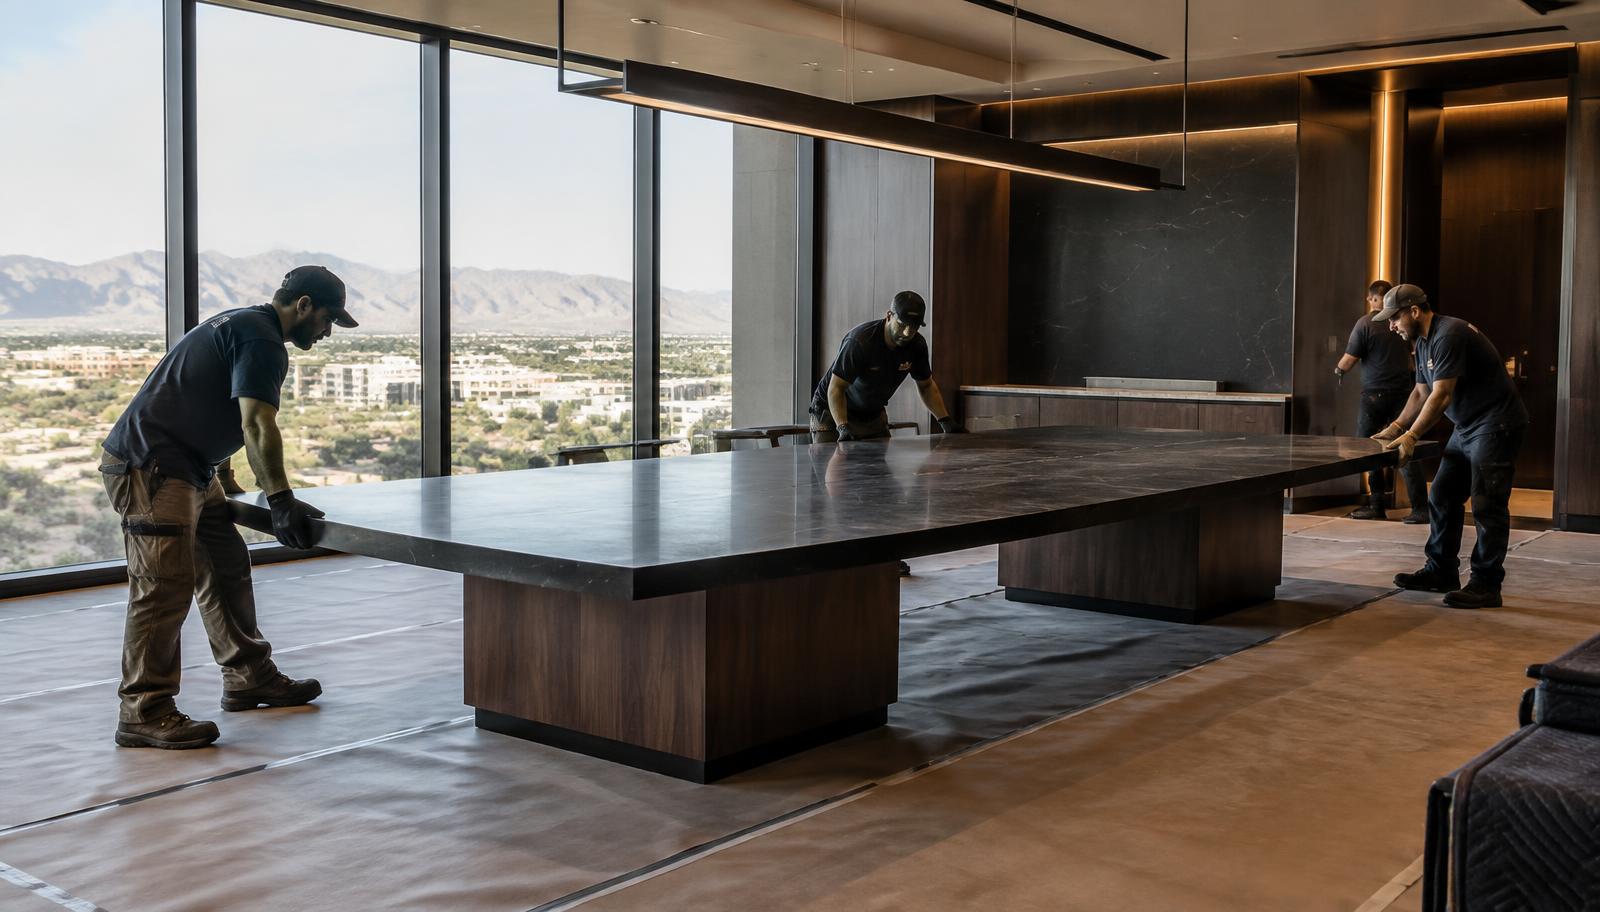
Most problems with a stone boardroom table installation are decided months before the table shows up, and almost none of them involve the table. They involve a door that was framed at 36 inches, a floor box poured 8 inches off the centerline, a freight elevator that is booked the morning of delivery, or a carpet crew that finished the day before and now has to work around a 16 foot top. The fabrication is the part everyone worries about. The coordination is the part that actually goes wrong.
This article is written for general contractors, project managers and superintendents who have a custom stone conference table on the schedule and want to know what has to be true on site before it arrives. It is the same list we walk through on every commercial job, in the order we would want a site to be ready.
What A Boardroom Table Installation Actually Involves
A boardroom table installation is the delivery, setting and final fitting of a finished table in the room it was designed for: bases placed and leveled, steel substructure secured, stone top sections set and joined, power and data connected at the floor, and the surface cleaned and protected for handover. On a long top, the table is not carried in whole. It arrives in pieces and becomes one table on site.
That last point shapes everything else. A 16 by 5 foot granite or quartzite top is heavy, rigid and unforgiving of twist during handling, so on longer formats we plan seams during design and assemble the sections in the room. Our Presidential direction is built this way from the start: a long format drawn in sections so every piece can travel through a normal commercial building. The seam locations are decided with the slab, the base positions and the device cores together, which is why they are fixed long before anyone books a delivery date.
For the contractor, the practical translation is simple. You are not receiving furniture. You are receiving a finished assembly that needs a clear path, a finished floor, confirmed utilities at known points, and a room where other trades are done. Treat it like millwork or a stone feature wall with a protected finish, not like a delivery that can be dropped in a corner and set later.
Measure The Path, Not Just The Room
Everyone measures the boardroom. Fewer people measure the route to it. The largest piece on the truck has to pass through the loading area, the building entrance, any corridor turns, the elevator cab and the boardroom door itself. A top section that clears a 42 inch door straight on can still fail at a tight corridor corner where it has to pivot. Walk the route with a tape and record the narrowest width, the lowest height and the tightest turn, because those three numbers decide how the top gets divided.
Elevators are the most common surprise. Check the interior cab dimensions, including the diagonal and any hatch or ceiling panel, and confirm the posted capacity. In a mid-rise office in Tempe or Phoenix the freight car often has to be reserved through property management days in advance, with padding hung and a building engineer present. If the only elevator is a passenger car with a 7 foot interior height, that single fact can change the section lengths.
- Narrowest clear opening on the route, measured at the door stop, not the frame
- Lowest overhead point, including sprinkler heads, exit signs and door closers
- Tightest corridor turn, with the width of both legs of the corner
- Elevator cab width, depth, height and diagonal, plus rated capacity and booking rules
- Loading dock or curb access, hours allowed, and any permit or HOA restrictions
Send those numbers with the plans, not after. When we have them during design, the section breaks land where the slab veining allows and where the base supports them, instead of where a late elevator measurement forces them.
Floor Boxes, Power And Data Must Land In The Right Place
If the table carries power, USB-C, data or AV connections, the building has to deliver those services to the exact point where the base meets the floor. On a slab building that usually means a poke-through or floor box set during construction. Once the flooring is down, moving it means cutting, patching and a visible repair right next to a finished stone table. We have seen boxes placed off the room centerline because the room was dimensioned from a wall that later moved, and the result is a cable run that shows or a base that sits off center.
The fix is dull and effective. Once the table layout is approved, locate floor boxes from the table drawings, dimensioned to the base footprints, and confirm them on site before the pour or before the raised floor panels are cut. Coordinate with the electrician and the low-voltage or AV contractor on who owns each connection: receptacles in the box, conduit up into the base, data cabling, and anything feeding a display. Our integrated technology page shows how power and data modules sit in the top and route down through the base, and the power and AV planning article covers the sequencing in more detail.
One rule saves a lot of trouble. Devices in the top are cored into the stone during fabrication, and cores cannot be relocated afterward. So the device count, device type and location are locked with the drawings, and the floor services are located to match those drawings, not the other way around.
Sequence The Install After The Dirty Trades
A stone top with a honed or leathered finish should be the last significant thing to enter the room, or very close to it. Paint, ceiling work, drywall sanding and light fixture installation above the table all create dust, drips and dropped tools. Carpet or hard flooring should be complete, because installing flooring around a set table means cuts at the base and a real risk of damage when heavy rolls move through the room. The best version of the schedule has the room painted, the ceiling closed, the lights hung, the floor finished and the AV rough-in done, with only final device trim and furniture remaining.
When a schedule is compressed and the table has to go in earlier, we still protect it, but the contractor should know what that costs in coordination. The top gets covered, the room is restricted, and every trade still working above it needs to be told. That is manageable on a two day overlap. It is not manageable on a two week overlap with ceiling and lighting crews on lifts over the table.
Build the table into the look-ahead schedule the same way you would build in a stone feature wall: with a firm date, a room readiness check a few days before, and a named person on site who can confirm access, elevator booking and utilities on the morning of install.
What Happens On Install Day
On site, the sequence follows the design. The bases go in first and are placed to the drawing dimensions, which is why the floor boxes need to be right. The steel substructure is secured and leveled, because stone will show any twist or low point the moment it is set. Then the top sections are brought in, set, aligned and joined at the planned seams, and the seams are finished so the table reads as one piece. On a mitered waterfall table, like our Waterfall direction, the waterfall panels have to meet the top edge cleanly, so leveling at the base is checked more than once.
Once the table is set, power and data are connected at the floor, devices in the top are tested, and any LED or reveal lighting on a Full Custom table is checked. The surface is cleaned and the table is either handed over or protected if other work remains in the room. Nothing about this requires the room to be empty of people, but it does require the room to be free of active trades and clear of stored material.
From the contractor, install day needs a small number of things done well: the route open and protected, the elevator reserved, the floor protected along the path, parking or a dock for the truck, and someone who can make a decision if a door closer has to come off for an hour.
How To Hand Us The Information We Need
The simplest way to keep a boardroom table off the punch list is to send the right drawings early. Floor plans with the room dimensioned from finished surfaces, a reflected ceiling plan so we know where lights and diffusers sit above the table, the electrical and low-voltage plans showing floor boxes, and the interior elevations showing credenzas, displays and any feature walls. Add the path measurements and building access rules, and we have almost everything we need to draw the table to the room.
From there, we produce renderings and drawings before fabrication, and those drawings become the coordination document for the table: base footprints, device locations, seam locations and overall dimensions. Our design, rendering, fabrication and installation process lays out that sequence, and the general contractor page explains how we fit into a commercial schedule alongside your other trades. If a designer or architect is leading specification, the specification article covers what they will usually want to see.
We install across the Valley, including tenant improvements in Tempe, office buildings in Scottsdale and new construction out toward Buckeye. Each of those job types has different access problems, from a downtown freight elevator to a new building where the drive is still gravel. The approach is the same in every case: know the path, lock the utilities, finish the room, then set the table.
If you have a boardroom on the schedule, the most useful thing you can do this week is send us the plans and the path measurements. You can also look through our recent work to see how long tops, waterfall edges and integrated power look once they are installed.